Updating Appointment Times

Dec 04, 2025
 88
88
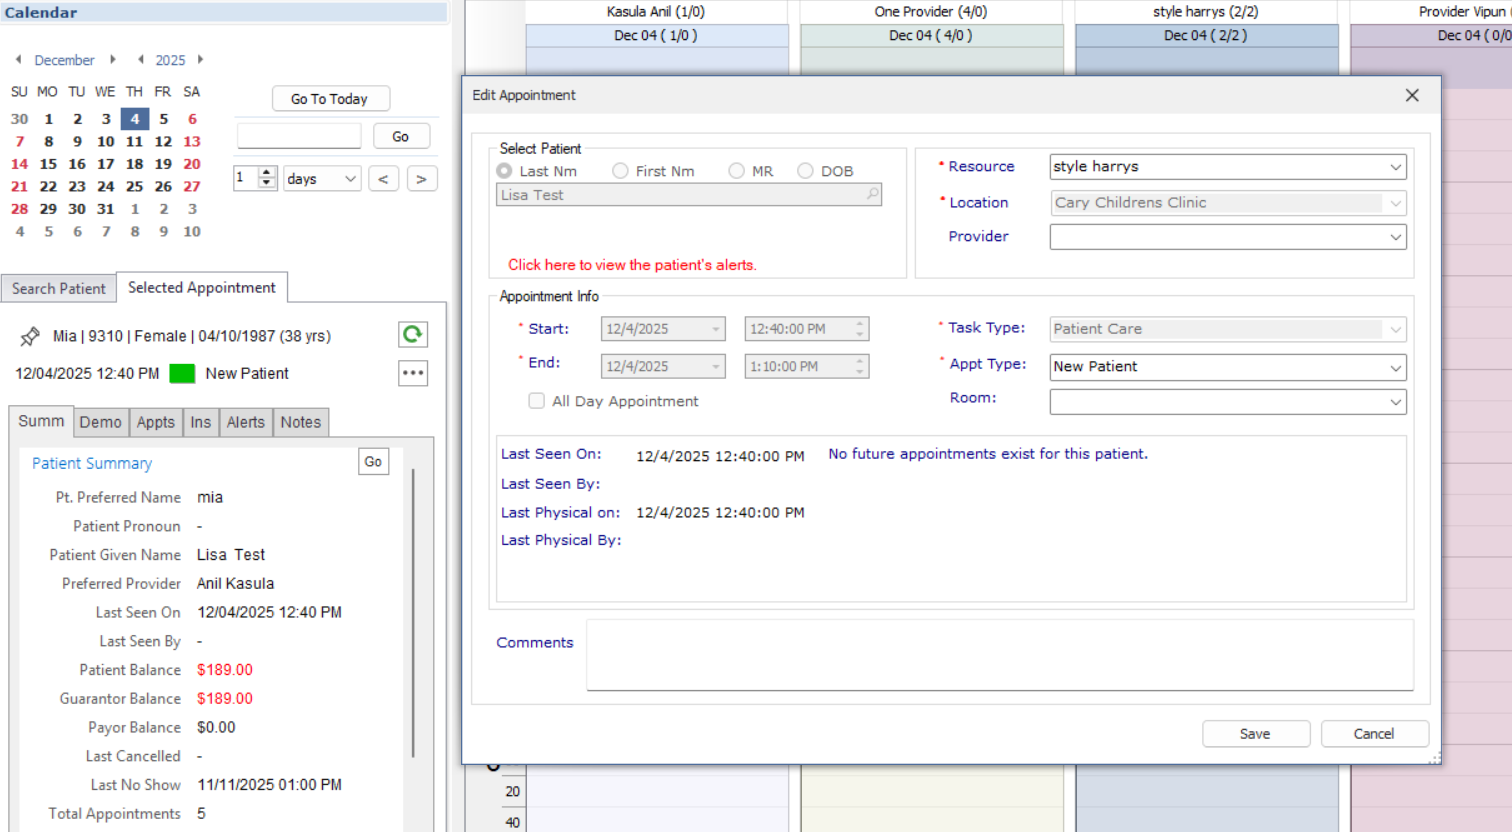
The time an appointment takes can be changed after the appointment has been created, but the method used depends on the appointment status.
If the appointment status hasn't been set to checked in yet, you can update it in the scheduler by double clicking on it.

If the appointment has been checked in, the start and end date can no longer be changed from the scheduler. Some of the fields will be grayed out because an encounter is created once an appointment is checked in. Because of this, you will have to go to the created encounter to update the appointment time.
To update an appointment's start and end date from the encounter
- Find the appointment in the patient's chart
- Right click on the desired encounter and select "Change Appt Info"
- The start and end times are no longer grayed out and can be edited
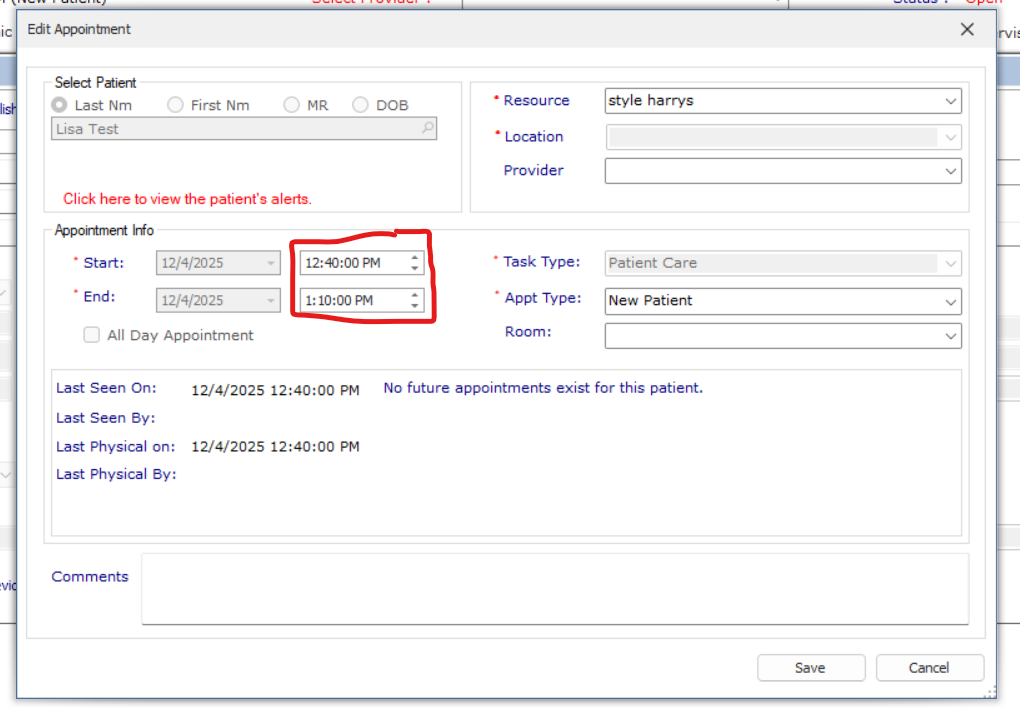
- Click Save

