167
167
Generating and running Quality Measures:
For MIPS you are able to generate and save the QRDA 1 files for required CMS measures. We recently made an update to run QRDA 1 files for both 'Certified Measures' and 'Other Measures' within the quality measures screen.
**Although these 'Other measures' we have implemented the correct values and coding in order to run those measures successfully, we have not been certified. Currently ReLiMed is only certified for the measures found under the 'Certified Measures' tab.
- Adminà Quality Dashboardà Quality Measures


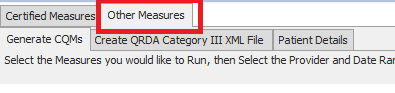
'Certified Measures' & 'Other Measures' Category 1 XML file:
- From here you will automatically open the ‘Certified measures’ tab at the top left-hand corner. All measures under here allow you to run the QRDA 1 file.
Your first step will be to generate the measures themselves.
You will see a handful of fields you can choose to run the measure for. (Location, year, provider, and the measure)

Once you have filled out those fields you will click ‘Generate’. Under this top section you will now see the new measure you are generating. In the status column this will be in pending status initially as all the data is being pulled together.
The system will run overnight, so we recommend you come back to this screen the following morning to see this measure in ‘completed’ status. (IF this is an urgent need you can contact support so our team can push this to generate now, we do this overnight so the system itself will run smoothly for clients during the workday)

- Once completed you will now go to the sub tab at the left-hand corner ‘Create QRDA Category I XML File’. You will fill in the fields exactly how you did when you generated these measures so then see and select the CQM you need to run now. (If you chose a provider when generating the measures you must select this provider on this screen to see the measure to select. Also making sure you select the date range you have run it for since past years will be shown under the ‘Generated measures’ drop down.) Also check the box ‘Generate QRDA Category I for All Patients in the Measure’. Then create the file.

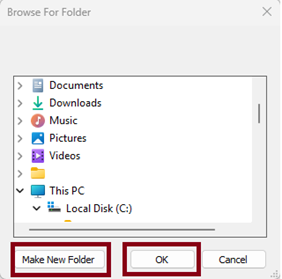
- The first pop up will allow you to find and select or create a new folder where these files will upload to. We do recommend creating a specific folder for these files to upload to as there will be a lot of individual files for each patient and you can keep this separate from any other work or personal file on your computer. You will select to highlight in blue the location to create the folder in, then click ‘Make New Folder’. If this folder reflects the name ‘new folder’ you can right click on this within the pop up to rename from here still. Then click ‘OK’.
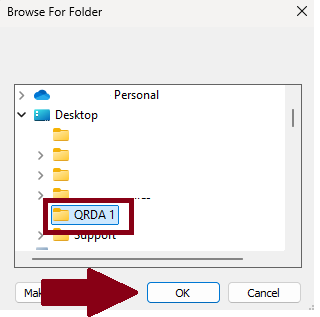
(After you have completed downloading the files you will see in Red font above where you ran this measure indicating which folder name this was saved under on your personal computer)
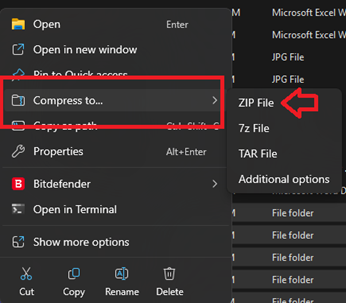
- Once these files have successfully downloaded, typically you will want to zip *compress* these files into 1 single attachment so this is easily uploaded for the 3rd party site.
You can do this by selecting all of the individual files (highlighting these)à right clicking on 1 of those files once highlightedà hover over ‘Compress to’ à then select ‘Zip’. Then you can rename this file differently if needed.
Now you will have the zip QRDA 1 file for the CQM measure that you can select as the attachment when uploading to the 3rd party site.
Other measures (Category III XML file):
- You will follow steps 1-2 but instead of generating the measures under ‘Certified measures’ you will go to the sub tab ‘Other Measures’.
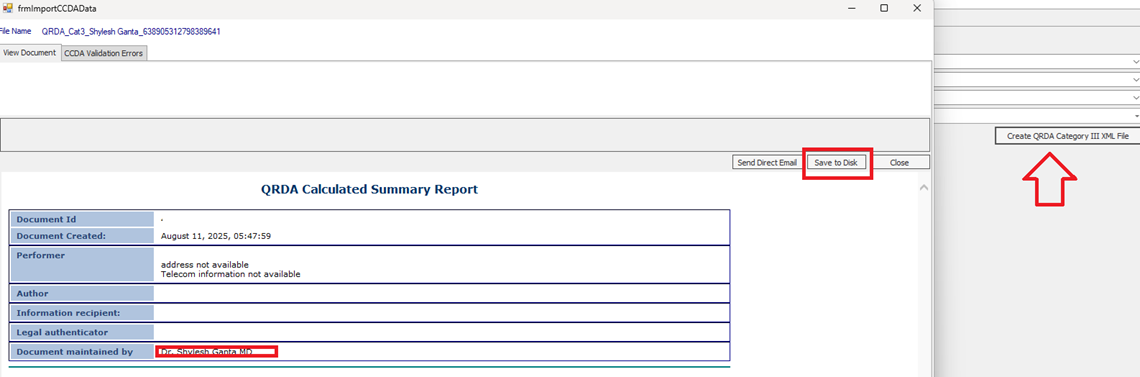
- Once you have generated the measure and this is in a completed status you will go to the sub tab ‘Create QRDA Category III XML File’. Fill in the fields as you did for generating the measure. And select QPP create file.
- From here a pop up will come up to review the measure and how the current rates and percentages are for that time period. But you can also click ‘save to Disk’ and your documents will pull up to save directly to your computer.